How to Customise the Accounts Receivable Table
You can customise the Accounts Receivable (AR) table to display the information most relevant to you.
How to Customise the Table
- Go to the Accounts Receivable module.
- At the bottom-left corner of the table, click the column settings icon (next to the “rows per page” selector).

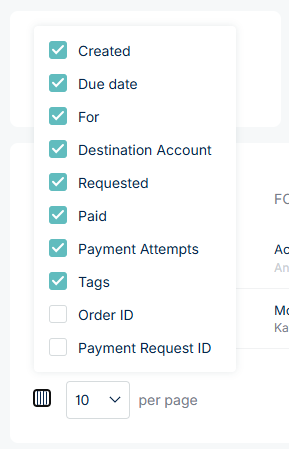
- A menu will appear showing all available columns.
- Use the checkboxes to select or deselect the columns you want to display.
Available Columns
You can enable or disable columns at any time, making it easier to focus on the data that matters most to you.
- Created → The date the payment request was created.
- Due Date → The payment’s due date.
- For → The Product or service plus the Customer name (if inputted).
- Destination Account → The NoFrixion account where funds will settle.
- Requested → The total requested payment amount.
- Paid → The amount successfully paid so far.
- Payment Attempts → The number of payment attempts made (plus a link to copy for sharing)
- Tags → Any tags linked to the payment request.
- Order ID → Displays the associated order ID if relevant.
- Payment Request ID → Displays the unique payment request identifier.